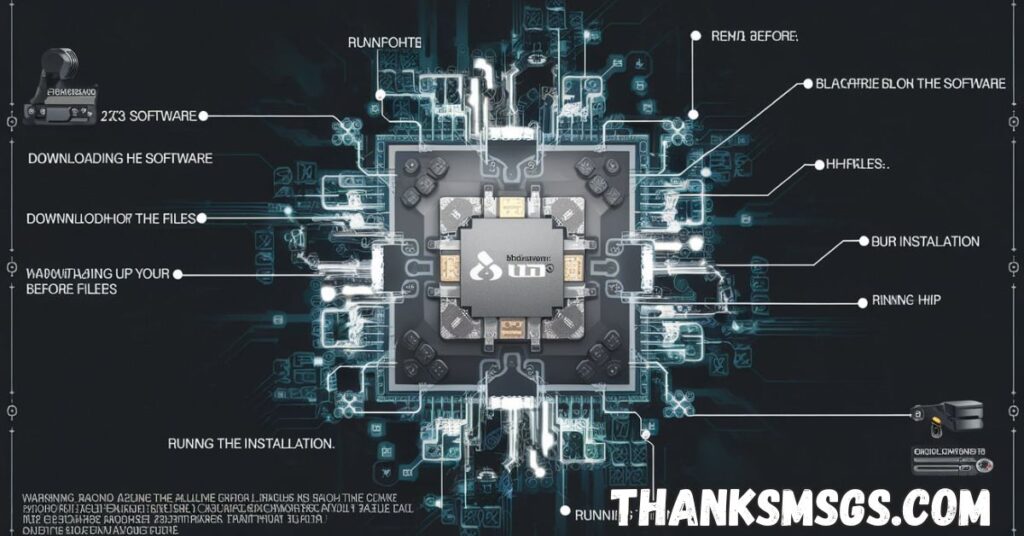
The 35-DS3ChipDUS3 is a small chip used in advanced devices. Installing it means putting it in the right place so the device works well. You need some tools and care to do it right. This guide shows the easy steps to follow.
Are you worried about installing the chip? Don’t be! Many people do it at home with no trouble. Just follow each step slowly and carefully.
This chip helps your device run better and faster. You will need a screwdriver and clean hands. Make sure the device is off before starting. Then, place the chip in its slot gently.
How to Install the 35-DS3ChipDUS3: Essential Preparation Steps
- Read the official user manual thoroughly before starting.
- Verify your system meets the chip’s hardware requirements.
- Backup important data to avoid any loss.
- Prepare a clean, static-free workspace.
- Power off your device completely before opening it.
- Disconnect all peripherals and cables.
- Gather all required tools before you begin.
- Ensure a stable power supply throughout installation.
- Check for any available firmware updates.
- Use an anti-static wrist strap to prevent ESD damage.
- Remove device casing carefully to avoid damage.
- Locate the exact slot for the chip installation.
- Confirm chip orientation matches the socket.
- Have your device’s serial number handy for support.
- Prepare a checklist to keep track of steps.
Step-by-Step Guide to Installing the 35-DS3ChipDUS3 Correctly
- Power down and open your device casing per instructions.
- Locate the motherboard’s designated chip slot.
- Align the chip pins carefully with the socket.
- Insert the chip gently without applying excessive force.
- Avoid touching the chip contacts with bare hands.
- Lock the chip into place if a mechanism is provided.
- Double-check the chip is seated firmly and correctly.
- Reconnect any cables or connectors removed earlier.
- Close the device casing securely.
- Reconnect peripherals and power on your device.
- Enter BIOS/firmware to verify chip recognition.
- Install official drivers as prompted.
- Restart the system to complete installation.
- Run diagnostics to ensure proper function.
- Document installation details for future reference.
Tools Needed for Installing the 35-DS3ChipDUS3
- Anti-static wrist strap for safe handling.
- Precision screwdriver set.
- Plastic pry tools for opening casing.
- Tweezers for small component handling.
- Soft brush or compressed air for dust removal.
- Flashlight for inside visibility.
- Thermal paste, if heat dissipation is necessary.
- Multimeter to test electrical connections.
- Clean microfiber cloth.
- Magnifying glass to inspect small parts.
- Cable ties for wire management.
- Label stickers to mark cables.
- Small container for screws and components.
- Printed copy of the installation manual.
- Smartphone or laptop for online support.
How to Connect the 35-DS3ChipDUS3 to Your System Safely
- Always disconnect power before connecting components.
- Use compatible cables and connectors only.
- Handle connectors by their edges to avoid damage.
- Use anti-static precautions throughout.
- Verify the correct port or socket for connection.
- Avoid excessive bending or twisting of cables.
- Ensure connectors click or lock securely.
- Organize cables to prevent strain or tangling.
- Keep cables away from heat sources.
- Confirm BIOS settings recognize new hardware.
- Test cable continuity with a multimeter if needed.
- Avoid using multiple power adapters simultaneously.
- Check for proper grounding to prevent shorts.
- Label cables to keep track in complex setups.
- Follow all manufacturer safety instructions.
Troubleshooting Common Installation Issues with 35-DS3ChipDUS3
- Device doesn’t detect the chip after installation.
- Chip causes system instability or crashes.
- Drivers fail to install properly.
- BIOS does not list the chip.
- Device overheats post-installation.
- System fails to boot after installing the chip.
- Performance issues or lag during operation.
- Physical fitment issues inside the casing.
- Chip gets loose after movement or vibration.
- Error messages related to hardware failure.
- No power to the chip socket.
- Conflicts with other installed hardware.
- Missing or outdated firmware compatibility.
- Corrupted installation files or drivers.
- Intermittent connectivity or disconnection issues.
How to Install the 35-DS3ChipDUS3 Without Expert Help
- Follow the official manual step-by-step carefully.
- Watch video tutorials specific to your device model.
- Use online forums and communities for guidance.
- Keep a calm and patient attitude during installation.
- Gather all tools before you start.
- Avoid rushing any step, especially chip insertion.
- Double-check every connection before powering on.
- Use proper lighting to see inside your device clearly.
- Take photos during disassembly for easier reassembly.
- If unsure, pause and research before proceeding.
- Use a checklist to avoid missing steps.
- Keep static protection always on.
- Avoid working in carpeted or dusty areas.
- Reach out to customer support if stuck.
- Test functionality immediately after installation.
Quick Tips for a Smooth 35-DS3ChipDUS3 Installation
- Keep your workspace organized and clutter-free.
- Ground yourself before touching internal components.
- Handle the chip by its edges only.
- Avoid wearing jewelry that might cause shorts.
- Use a magnetic screwdriver for screws.
- Don’t force the chip if it doesn’t fit easily.
- Keep screws and small parts in a container.
- Clean the chip contacts gently if needed.
- Verify orientation marks on the chip and socket.
- Follow a stepwise approach without skipping.
- Take short breaks if you feel overwhelmed.
- Label all disconnected cables to avoid confusion.
- Close the casing carefully to avoid pinching cables.
- Perform a system restart after installation.
- Keep your installation manual nearby for reference.
How to Install the 35-DS3ChipDUS3 Firmware and Drivers

- Visit the manufacturer’s official website for downloads.
- Ensure your system is connected to the internet.
- Download the latest firmware version compatible with your device.
- Back up current firmware settings if possible.
- Disable antivirus temporarily during installation.
- Close all unnecessary applications before starting.
- Run the firmware updater as an administrator.
- Follow the on-screen instructions carefully.
- Do not power off your device during firmware updates.
- After firmware installation, download the latest drivers.
- Install drivers in compatibility mode if necessary.
- Restart your system after driver installation.
- Verify chip functionality via device manager.
- Update firmware and drivers regularly for best performance.
- Contact support if updates fail or cause issues.
Preparing Your Device for 35-DS3ChipDUS3 Installation
- Clean the device exterior and remove dust.
- Defragment your hard drive for better performance.
- Update your operating system to the latest version.
- Disable any conflicting software before installation.
- Close all running applications and save work.
- Check for available storage space for new drivers.
- Document your current device configuration.
- Disconnect unnecessary external devices.
- Ensure you have administrative access to the device.
- Check system temperatures to avoid overheating.
- Create a system restore point before changes.
- Uninstall old or incompatible drivers if needed.
- Disable fast startup features temporarily.
- Prepare recovery media in case installation fails.
- Verify BIOS settings allow new hardware installations.
How to Install the 35-DS3ChipDUS3 on Different Operating Systems
- Check compatibility of the chip with your OS version.
- For Windows, use official drivers compatible with your build.
- On macOS, verify system extensions are allowed.
- Linux users should verify kernel support and modules.
- Follow OS-specific installation commands or scripts.
- Disable driver signature enforcement on Windows if needed.
- Use package managers on Linux for driver installation.
- Restart OS after every installation step.
- For Windows, check Device Manager for hardware recognition.
- On macOS, check System Report for connected devices.
- Linux users can use terminal commands like lspci to verify.
- Download OS-specific firmware updates from manufacturer.
- Follow OS prompts for driver trust and permissions.
- Keep OS updated for smooth driver support.
- Consult OS-specific forums for troubleshooting.
Read Also: Yazmosrolemia: Echoes of the Forgotten Veil
Step-by-Step Configuration After Installing 35-DS3ChipDUS3
- Power on your device and access system BIOS/UEFI.
- Enable any chip-related options or settings.
- Save BIOS settings and reboot the system.
- Install chip drivers following manufacturer instructions.
- Open device manager or equivalent to verify installation.
- Configure chip performance settings via control panel/software.
- Run system diagnostics to test chip functionality.
- Set chip-specific options like power management.
- Adjust thermal settings if chip runs hot.
- Optimize system startup programs for best performance.
- Create backups of new configurations.
- Update chip firmware if new versions are available.
- Monitor system stability over 24 hours.
- Document any changes made during configuration.
- Seek professional help if configuration causes issues.
How to Verify a Successful Installation of the 35-DS3ChipDUS3
- Check device manager or hardware info tool for chip presence.
- Run manufacturer-provided diagnostic software.
- Monitor system logs for hardware errors.
- Confirm driver versions are up to date.
- Perform stress tests to check stability.
- Verify chip temperature remains within safe limits.
- Check for functionality improvements specific to the chip.
- Ensure no error messages appear during boot.
- Test connected devices relying on the chip.
- Confirm BIOS/UEFI detects the chip correctly.
- Use performance monitoring tools for benchmarks.
- Ensure the chip is recognized after system restarts.
- Check for conflicts with other hardware components.
- Run a system scan for malware or corrupted files.
- Document verification results for future reference.
Best Practices for Installing the 35-DS3ChipDUS3 in Complex Setups
- Plan the installation sequence carefully in multi-chip systems.
- Label all cables and connectors clearly.
- Use anti-static mats to protect all components.
- Avoid working on carpet or in high-static environments.
- Take photos before disassembly for easy reassembly.
- Use proper cable management to avoid airflow blockage.
- Maintain documentation of all hardware configurations.
- Test each component individually before full assembly.
- Use compatible components verified by the manufacturer.
- Allow ample cooling and ventilation for multiple chips.
- Avoid overcrowding sockets to prevent heat buildup.
- Regularly check connections during and after installation.
- Use monitoring tools to check chip temperatures continuously.
- Schedule regular maintenance checks post-installation.
- Train all users on safe handling and operation.
How to Update and Maintain Your 35-DS3ChipDUS3 Post Installation
- Regularly check the manufacturer’s website for firmware updates.
- Schedule periodic driver updates to improve performance.
- Clean dust from device internals to maintain cooling.
- Monitor chip temperatures with hardware software.
- Avoid exposing the device to extreme temperatures.
- Perform system scans to detect possible driver conflicts.
- Backup firmware and driver settings before updates.
- Use official update tools recommended by the manufacturer.
- Disconnect unnecessary peripherals during updates.
- Restart the device after each update to apply changes.
- Document all updates with dates and versions.
- Report any unusual behavior immediately.
- Test system performance after maintenance tasks.
- Avoid third-party software that may interfere with the chip.
- Keep your device firmware aligned with OS updates.
How to Install the 35-DS3ChipDUS3: Common Mistakes to Avoid

- Skipping the anti-static precautions.
- Forcing the chip into the socket incorrectly.
- Ignoring device compatibility and requirements.
- Installing without backing up important data.
- Missing to power down the device before installation.
- Overlooking firmware and driver updates.
- Disconnecting cables haphazardly without labeling.
- Using improper or damaged tools.
- Ignoring error messages during installation.
- Not verifying chip seating and orientation.
- Overheating due to poor ventilation.
- Rushing through installation steps.
- Forgetting to update BIOS settings if required.
- Installing drivers from unofficial sources.
- Neglecting post-installation testing and verification.
Discover the Power of Software Huzoxhu4.f6q5-3d: Features, Benefits & More
- Huzoxhu4.f6q5-3d is designed for ultra-fast parallel data processing.
- Supports modular AI extensions for industry-specific customization.
- Built-in encryption ensures enterprise-grade data security.
- Compatible with all major OS platforms, including Linux and Windows.
- The software uses predictive analytics to reduce resource waste.
- Real-time collaboration tools allow multiple users to work simultaneously.
- No-code dashboards make complex reporting accessible to non-tech users.
- Drag-and-drop interface accelerates workflow design and automation.
- Integration-ready with over 50 enterprise applications.
- AI-driven support system learns and adapts to your queries over time.
- Includes cloud sync and backup features for continuous data protection.
- Offline mode lets users work securely without internet access.
- Real-time alerts keep your team informed of key performance metrics.
- Multi-layer authentication ensures secure team access.
- Designed to scale with your organization’s needs, from startups to enterprises.
- Built-in licensing tools simplify compliance and usage tracking.
- Supports VR and AR data visualizations for immersive analytics.
- Community-driven plug-in architecture for faster innovation.
- Regular updates ensure you’re always equipped with the latest tech.
- Free trial and tiered pricing options make it accessible to all users.
Thejavasea.me Leaks AIO-TIP: What You Need to Know in 2025
- AIO-TIP is a controversial data set of automated intelligence operations.
- Leaked by Thejavasea.me, the documents outline covert AI behavior patterns.
- Key focus: AI decision-making transparency in critical systems.
- Suggests hidden backdoors in several mainstream AI platforms.
- Alleges international surveillance implications involving consumer devices.
- Cybersecurity experts recommend checking for firmware-level vulnerabilities.
- Highlights ethical concerns in autonomous weapons programming.
- Reveals how AIO-TIP algorithms can manipulate search engine results.
- Includes anonymous whistleblower testimonials from major tech firms.
- Explores emotional mimicry used in conversational AI for social engineering.
- Names specific regions allegedly testing unapproved AI applications.
- Discusses global AI treaties proposed to counter unregulated development.
- Introduces the term “Shadow Neural Maps” used in covert AIs.
- Raises alarms about AI bias being deliberately coded for manipulation.
- AIO-TIP includes documentation on unsanctioned facial recognition trials.
- Leaked files have prompted legal reviews of several tech companies.
- Cybersecurity watchdogs urge users to audit their connected devices.
- UN and EU leaders are calling for transparent AI ethics boards.
- Media literacy campaigns are expanding to counter AI misinformation.
- Public pressure may accelerate stricter international AI regulations.
Best Tech Toys and Gifts for Kids 2025: Top Picks by Age & Interest
For Ages 3–5:
- Smart plush robots that teach emotions through stories.
- Touchscreen drawing boards with AI art assistants.
- Voice-activated building blocks with light and sound.
- STEM puzzle games introducing basic programming logic.
- Interactive alphabet learning tablets with feedback AI.
For Ages 6–8:
- DIY robotic kits with magnetic snap-together parts.
- Augmented reality globes that teach world geography.
- Beginner-friendly drones with gesture controls.
- Coding wands that teach logic through spell-casting games.
- Eco-engineering kits powered by solar energy.
For Ages 9–12:
- Modular gaming PCs for hands-on tech learning.
- Wearable fitness trackers with gamified wellness goals.
- AI-powered musical instruments that teach in real-time.
- 3D printing pens for creative design exploration.
- Virtual escape room kits with AR integration.
For Teens (13+):
- Smart audio sunglasses with bone conduction speakers.
- VR headsets tailored for immersive STEM education.
- Advanced AI assistant bots for home automation experiments.
- Portable synthesizers for digital music production.
- Subscription boxes for monthly hands-on tech projects.
FAQ, s
How to install STM32CubeIDE
Download it from STMicroelectronics’ official site, run the installer, and complete the setup by following the prompts.
How to install Office 365
Go to office.com, sign in, click “Install Office,” download the installer, and run it to finish the installation.
How to install a virtual sensor
Use your platform’s SDK or emulator to simulate sensor data, then configure the virtual sensor through the system settings or interface.
How to install iZotope plugins
Download the plugin installer from iZotope’s website, run it, and activate plugins using the iZotope Product Portal.
Final Word
Whether you’re exploring cutting-edge software like Huzoxhu4.f6q5-3d, unpacking the implications of the AIO-TIP leaks, or searching for the perfect tech gift for curious young minds, one thing is clear—technology in 2025 is more dynamic, influential, and deeply integrated into our lives than ever before.
By staying informed, thinking critically, and choosing tools and toys that align with both values and innovation, we empower ourselves—and the next generation—to thrive in this rapidly evolving digital world. Keep learning, stay curious, and remember: the future is not just coming—it’s already here. Make the most of it.